CamaroDMD
Insert Cool Title
This is a tutorial discussing how to send a baseball through the mail for an autograph. Like anything, there are multiple ways to do this…but I thought I would share the way I do it. I have been doing this for a few years and have developed a ****od that seems to work quite well. So, I thought I would share it with you.
First, let me start by saying that you really can’t do a TTM baseball on the cheap. The cost for each one that I send out is around $30. Perhaps it could be a few dollars cheaper if supplies are bought in bulk. Due to the cost, make sure you do your homework as each lost ball is a big expense.
First we will start out with a supplies list:
Supplies
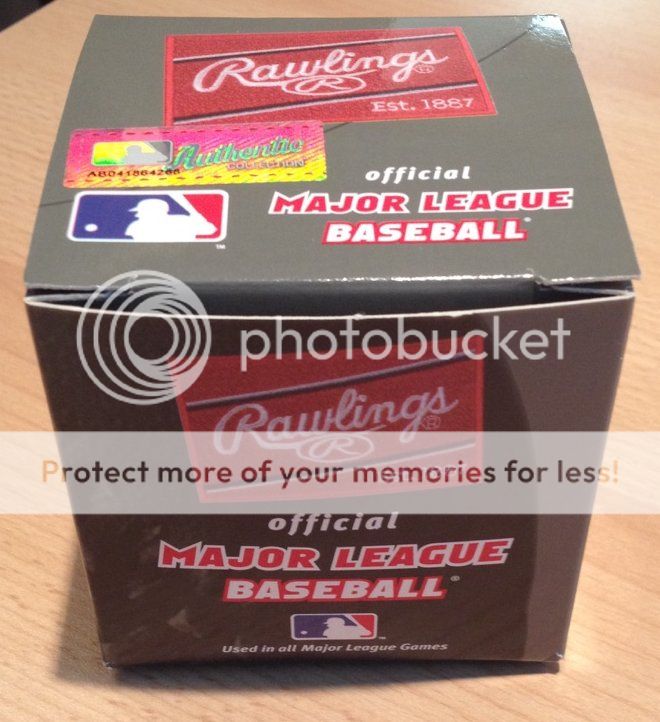
1 Rawlings Official Major League Baseball
1 New Blue Ball-Point Pen (just a cheap one…Bic or Papermate are perfect)
1 Large Size Bubble Mailer (I use a 9.5in x 13.75in)
1 Medium Size Bubble Mailer (I use a 6in x 9.25in)
11 Postage Stamps
1 Ziploc Sandwich Bag
1 Nicely Handwritten Letter
OK, now that we have our supplies all in order I’m going to briefly discuss why I use these particular items and how to assemble your TTM request.
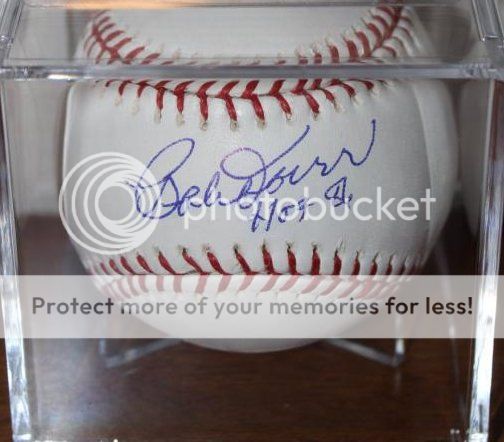
First, let me start by discussing the ball itself since that is the centerpiece of this project. The baseball is the expensive part of this project. ONLY use a Rawlings Official Major League Baseball (ROMLB). There are a couple reasons for this. First, it’s made from high grade leather and because of that the signature will stay bold long term and won’t bleed or smear. Often, lower grade baseballs or “souvenir balls” are actually made out of plastic and after a short time (a matter of months) a very nice signature can deteriorate. Secondly, an authentic ball simply makes the piece much more desirable. The truth is: if the signature isn’t on a ROMLB it’s not very collectible. The current price for an ROMLB is $18-$20. They can be purchased cheaper if in bulk. But, the result is worth the expense.
Next, I’m going to discuss the pen. This is an often overlooked part of a TTM baseball project but it’s critical to do it right. ALWAYS SEND YOUR OWN PEN. The best pen for signing a baseball is a cheap blue ball-point pen. AVOID gel pens, sharpies, or any other nicer pen. Those inks tend to bleed, smear and fade on a baseball. The majority of collectors prefer blue ink on a baseball as you get very nice contrast on the white leather. So, a blue cheap ball-point pen is the way to go (I use either Bic or Papermate pens).

The final critical piece to this project is the letter. ALWAYS hand write the letter. Keep it fairly brief, no more than a page. I usually write my letters in three paragraphs. The first paragraph I introduce myself. I tell the recipient a little about who I am. My second paragraph is where I briefly explain why I am interested in their career. Basically, this is where I explain why they are special to me and why I want to add their autograph to my collection. The third and final paragraph is where I ask them for their autograph. Don’t be afraid to ask for what you want. If you want them to add something to the ball other than their signature…ask them. It never hurts to ask them to add “HOF 2000” or “#35” with their signature. They might not do it…but frequently they will. Also, I specifically say in my letter to “please autograph the ball with the included pen.”
With the letter, always be kind and gracious. Thank them for their time. Remember they are doing you a favor by taking the time to sign your ball. They don’t have to do it…and many don’t. It’s important that those who are still willing to sign know that their efforts are appreciated.
Obviously, the letter is the most personal part of this process. There is no format that must be followed…do it however you think fits you. I have described how I do it…but that certainly isn’t the only way.
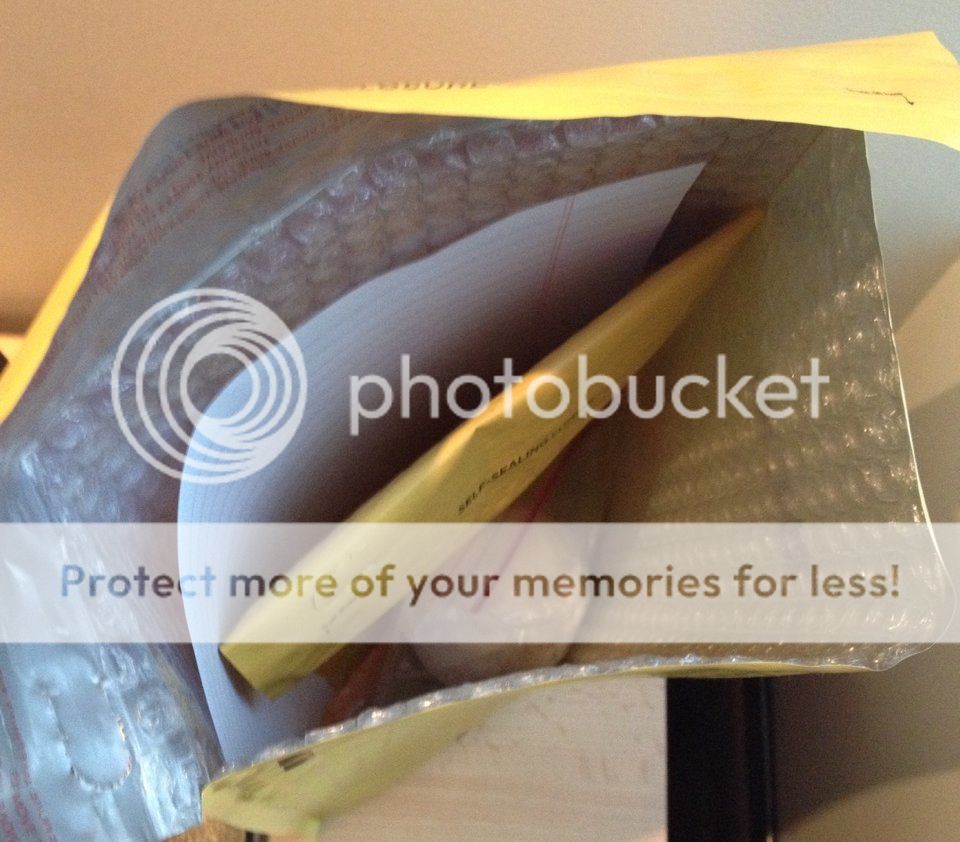
OK, now that we have our ball, pen and letter…it’s time to assemble the whole thing. Take the two bubble mailers.
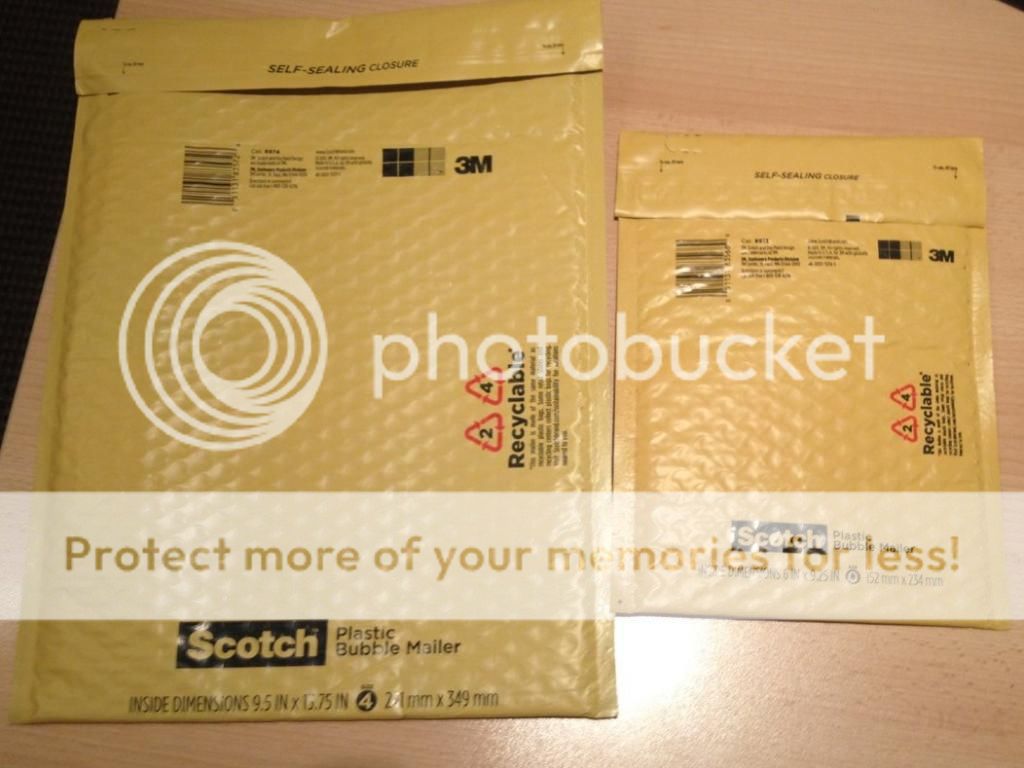
The larger mailer will be the mailing envelope. Address the envelope with the player’s address and put your return address in the corner. Don’t forget the return address. If their address turns out to be bad…it’s nice to get your $20 ball back. Also, be careful that the address ink doesn’t smear. A lot of these bubble mailers have a glossy finish and ink can smear. Put 6 stamps on the envelope. The smaller mailer will be our self-addressed stamped return envelope (SASE). Address this envelope with your address as the mailing address AND THE RETURN ADDRESS. This will ensure it gets back to you. Put 5 stamps on this envelope.
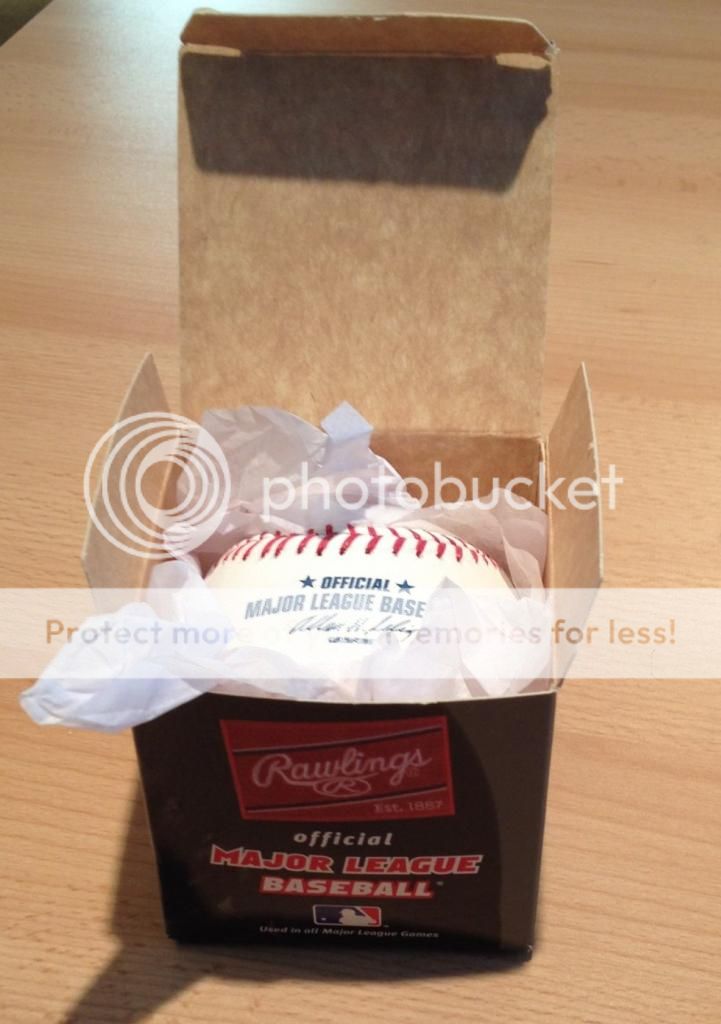
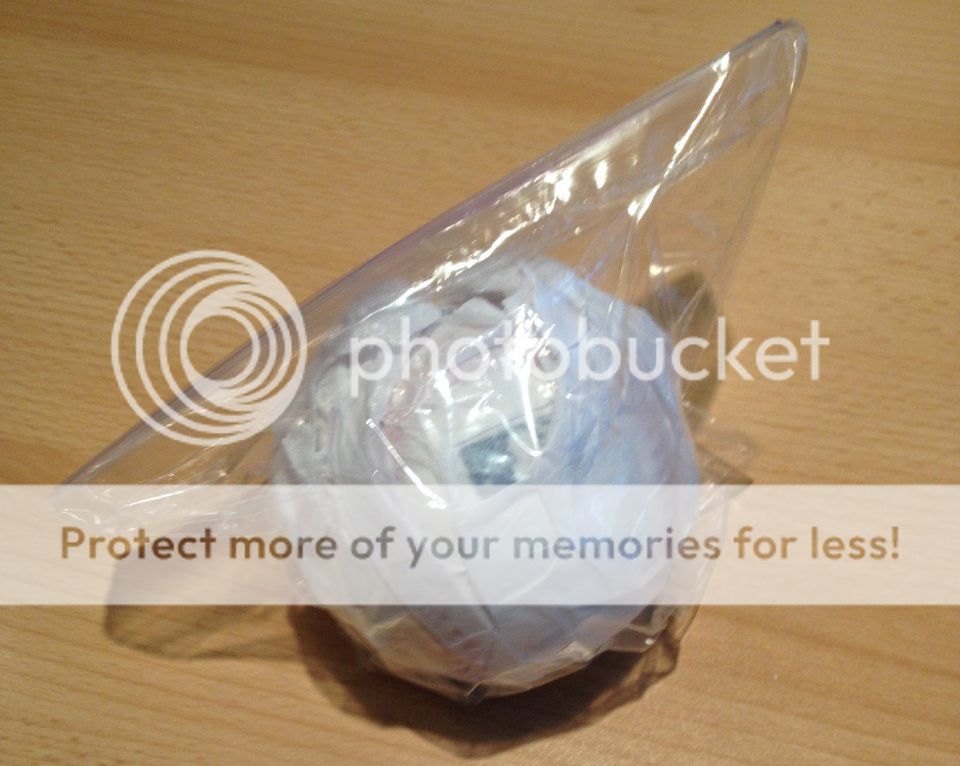
The last thing to do before you assemble everything and mail is to prepare the pen and the ball. With the pen, test it before you mail it. Make sure the ink is flowing and that the pen works. Often, I will write my letter with the pen. The last thing you want is a pen that is defective and wants to bleed or leak. Next, you want to prepare the baseball for its journey. A ROMLB comes in a cardboard box wrapped in tissue paper (see photo below). Remove the ball from the box but keep the tissue paper. Put the baseball wrapped in tissue paper inside a Ziploc sandwich bag, bleed out the air and seal it. This will protect the ball if the package happens to get wet in transit or if the pen breaks.
Now it is time to assemble everything. Place the letter, pen, SASE and baseball (in Ziploc bag) into the larger mailing envelope. Before sealing…double check that everything is there. There should be 4 items in the envelope. Seal the envelope and mail.
So, that’s it. Now it’s just time to play the waiting game. Hopefully in the near future you will receive your ball back signed. Good Luck!
First, let me start by saying that you really can’t do a TTM baseball on the cheap. The cost for each one that I send out is around $30. Perhaps it could be a few dollars cheaper if supplies are bought in bulk. Due to the cost, make sure you do your homework as each lost ball is a big expense.
First we will start out with a supplies list:
Supplies
1 Rawlings Official Major League Baseball
1 New Blue Ball-Point Pen (just a cheap one…Bic or Papermate are perfect)
1 Large Size Bubble Mailer (I use a 9.5in x 13.75in)
1 Medium Size Bubble Mailer (I use a 6in x 9.25in)
11 Postage Stamps
1 Ziploc Sandwich Bag
1 Nicely Handwritten Letter
OK, now that we have our supplies all in order I’m going to briefly discuss why I use these particular items and how to assemble your TTM request.
First, let me start by discussing the ball itself since that is the centerpiece of this project. The baseball is the expensive part of this project. ONLY use a Rawlings Official Major League Baseball (ROMLB). There are a couple reasons for this. First, it’s made from high grade leather and because of that the signature will stay bold long term and won’t bleed or smear. Often, lower grade baseballs or “souvenir balls” are actually made out of plastic and after a short time (a matter of months) a very nice signature can deteriorate. Secondly, an authentic ball simply makes the piece much more desirable. The truth is: if the signature isn’t on a ROMLB it’s not very collectible. The current price for an ROMLB is $18-$20. They can be purchased cheaper if in bulk. But, the result is worth the expense.

Next, I’m going to discuss the pen. This is an often overlooked part of a TTM baseball project but it’s critical to do it right. ALWAYS SEND YOUR OWN PEN. The best pen for signing a baseball is a cheap blue ball-point pen. AVOID gel pens, sharpies, or any other nicer pen. Those inks tend to bleed, smear and fade on a baseball. The majority of collectors prefer blue ink on a baseball as you get very nice contrast on the white leather. So, a blue cheap ball-point pen is the way to go (I use either Bic or Papermate pens).

The final critical piece to this project is the letter. ALWAYS hand write the letter. Keep it fairly brief, no more than a page. I usually write my letters in three paragraphs. The first paragraph I introduce myself. I tell the recipient a little about who I am. My second paragraph is where I briefly explain why I am interested in their career. Basically, this is where I explain why they are special to me and why I want to add their autograph to my collection. The third and final paragraph is where I ask them for their autograph. Don’t be afraid to ask for what you want. If you want them to add something to the ball other than their signature…ask them. It never hurts to ask them to add “HOF 2000” or “#35” with their signature. They might not do it…but frequently they will. Also, I specifically say in my letter to “please autograph the ball with the included pen.”
With the letter, always be kind and gracious. Thank them for their time. Remember they are doing you a favor by taking the time to sign your ball. They don’t have to do it…and many don’t. It’s important that those who are still willing to sign know that their efforts are appreciated.
Obviously, the letter is the most personal part of this process. There is no format that must be followed…do it however you think fits you. I have described how I do it…but that certainly isn’t the only way.
OK, now that we have our ball, pen and letter…it’s time to assemble the whole thing. Take the two bubble mailers.

The larger mailer will be the mailing envelope. Address the envelope with the player’s address and put your return address in the corner. Don’t forget the return address. If their address turns out to be bad…it’s nice to get your $20 ball back. Also, be careful that the address ink doesn’t smear. A lot of these bubble mailers have a glossy finish and ink can smear. Put 6 stamps on the envelope. The smaller mailer will be our self-addressed stamped return envelope (SASE). Address this envelope with your address as the mailing address AND THE RETURN ADDRESS. This will ensure it gets back to you. Put 5 stamps on this envelope.
The last thing to do before you assemble everything and mail is to prepare the pen and the ball. With the pen, test it before you mail it. Make sure the ink is flowing and that the pen works. Often, I will write my letter with the pen. The last thing you want is a pen that is defective and wants to bleed or leak. Next, you want to prepare the baseball for its journey. A ROMLB comes in a cardboard box wrapped in tissue paper (see photo below). Remove the ball from the box but keep the tissue paper. Put the baseball wrapped in tissue paper inside a Ziploc sandwich bag, bleed out the air and seal it. This will protect the ball if the package happens to get wet in transit or if the pen breaks.


Now it is time to assemble everything. Place the letter, pen, SASE and baseball (in Ziploc bag) into the larger mailing envelope. Before sealing…double check that everything is there. There should be 4 items in the envelope. Seal the envelope and mail.

So, that’s it. Now it’s just time to play the waiting game. Hopefully in the near future you will receive your ball back signed. Good Luck!

Last edited: