CamaroDMD
Insert Cool Title
OK, now that we have our card designed and finalized…it’s time to start production. For this, I like to save my card as a .JPG image file for easier use. In Photoshop, go to the toolbar in the upper left hand corner and select File/Save As. Save it as a .JPG and when prompted make sure the slider bar is set to maximum quality. Do this for both the front and the back.
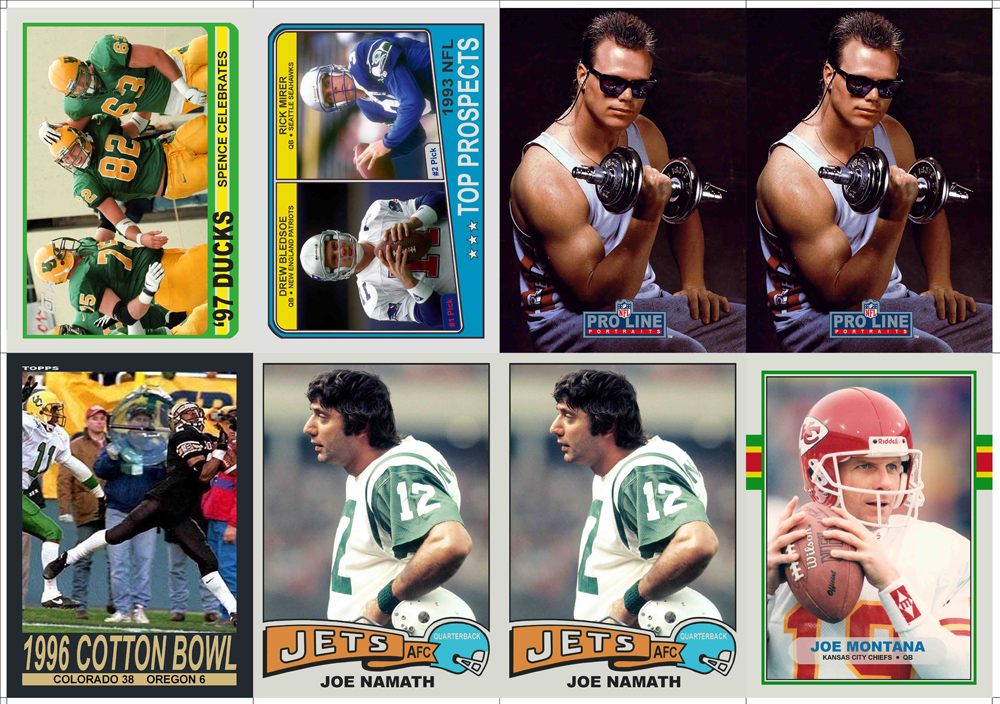
I print my cards on full size 8.5x11 inch paper with 8 cards per sheet. I have devised a print template that has a series of lines in place that allow for the cards to be cut properly. The print template is 6086x4286 and on a transparent background. You will also notice that there is an additional line that runs along the top boarder and the left boarder of the template. These lines will be important for the actual production of the cards later on.
You can simply drag the individual card .JPGs into a new template Photoshop document and position them as needed.
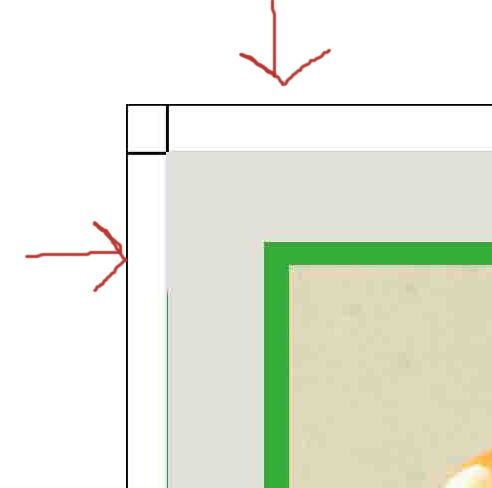
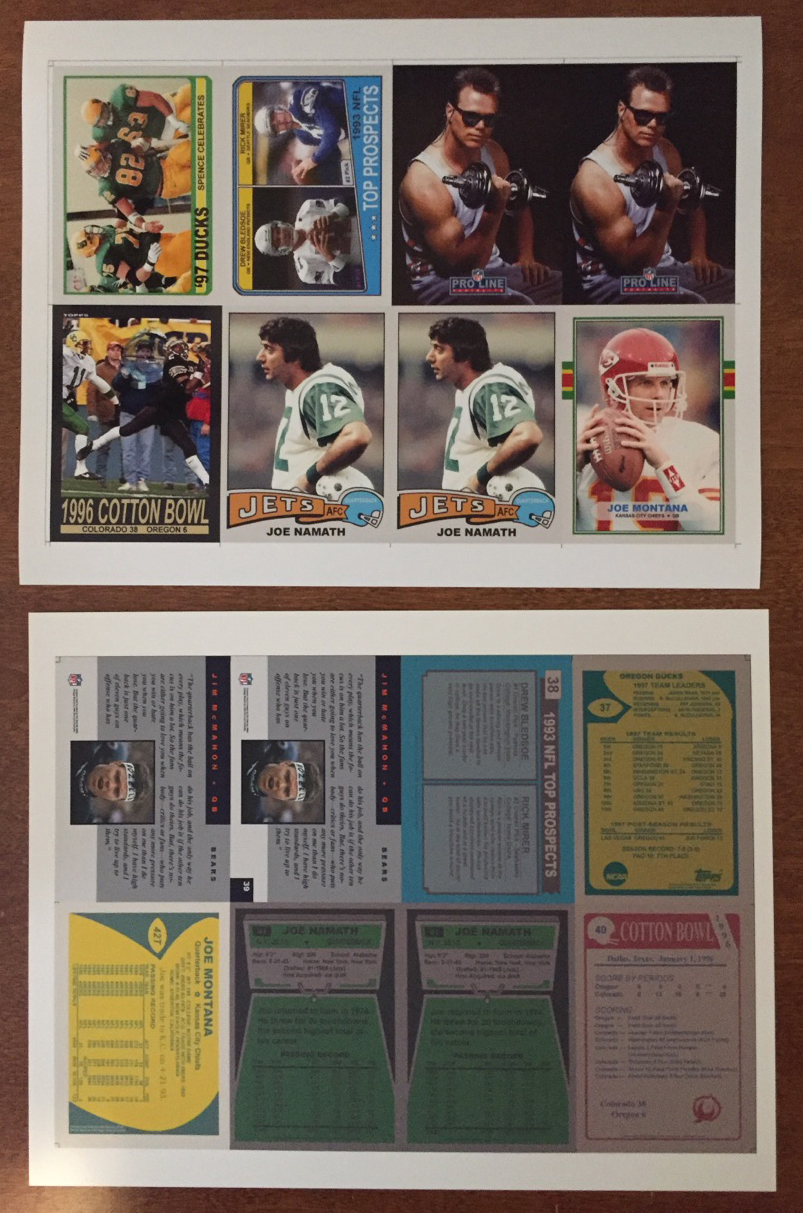
Below you will see the template (first image). Note that around the cards there are little black “lines” sticking out. These will be used when we cut the sheet into individual cards. From this point on, I will refer to these lines as “Cut Lines.” In the second image below, I have zoomed in on the upper left hand corner. You can see the additional line to the top and the left of the sheet. These run the full length of the sheet. From this point on, I refer to these additional lines “Guide Lines.” The guide lines will play an important role in Part 4 of the tutorial.
The back template is laid out in much the same fashion. There are a couple differences however. First, you will notice that the cards are arranged backwards. On the front template (see above), our Joe Montana card is in the lower right hand corner. On the back template he is in the lower left hand corner. It’s important to understand that the back side of our sheet will be the same orientation from top to bottom but will be reversed from left to right. That is why the sheet is laid out in this way. The guide lines are also in a different place. They are on the right hand side and the top (verses being on the left and top for the front sheet).
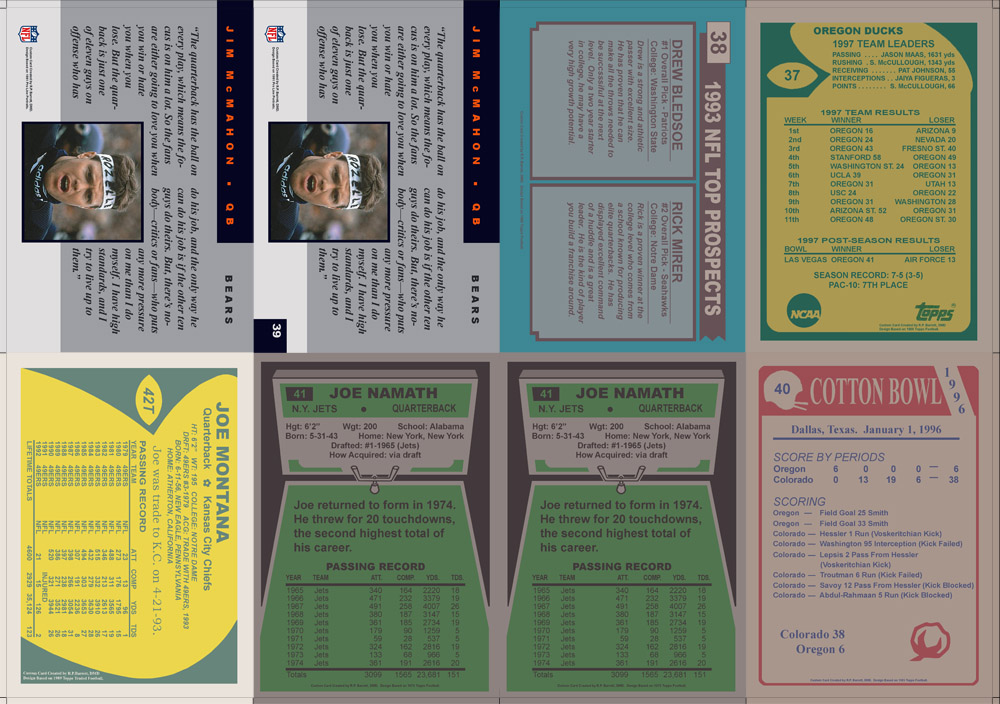
You will also notice one additional difference with the back template. It’s not on a transparent background. The background color of the adjacent card extends to the edge of the template in all directions. This will help with the actual assembly and cutting of the cards which I will discuss in Part 4. Here is the colored template background with the cards hidden.
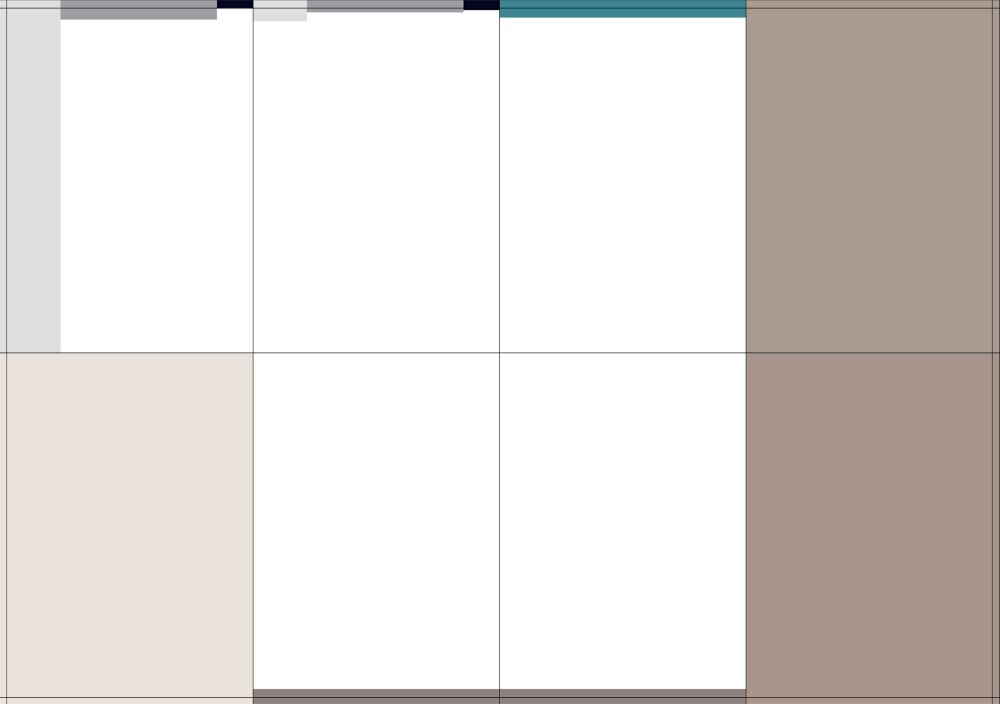
You can see that all the area outside the cut lines are filled with the color of the card (the area in the middle under the cards is unimportant). To do this, use the dropper tool and then use the rectangular marquee tool to create a selection in the appropriate area and fill it. Make sure you have the background layer selected and it is the very bottom layer of the template file.
Now that you have your templates laid out and ready to go…it’s time to actually print the cards.
I have pre-made templates I created for printing. I simply delete my old cards out and drag new cards in to print. If you would like me to send you a blank front and back template I am happy to do so. The lines are all in place so all you have to do is put the cards in and adjust the back background colors to match your cards. Please PM me and I will send them to you.
You will want to use different types of paper on the front and the back. Older cards like this tended to have a slightly glossy front side and a matte back. I use HP Everyday Glossy Photo Paper for the front and Epson Premium Matte Photo Paper for the back.
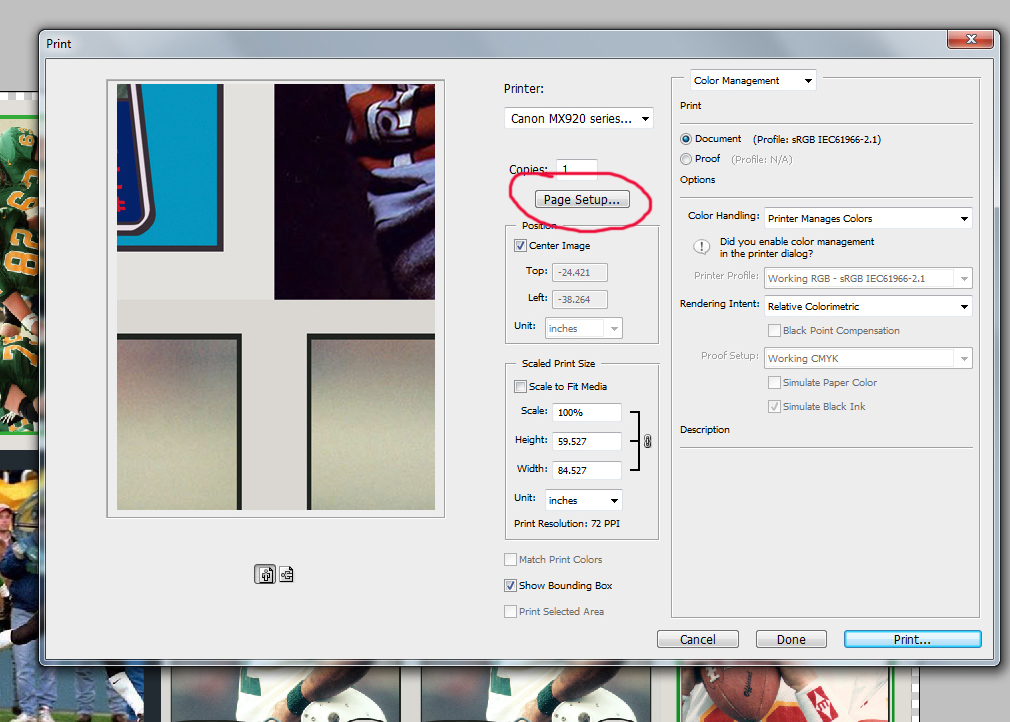
We will print the front first. Open the front template .PSD file and in the upper left tool bar select File/Print. You should see a screen that looks like this. Select “Page Setup.”
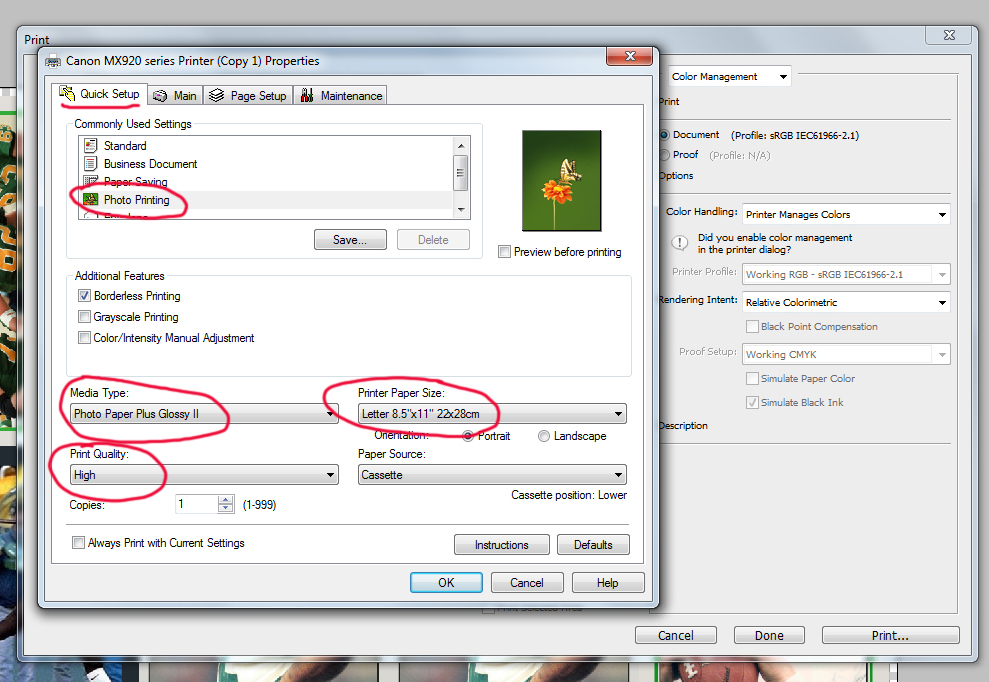
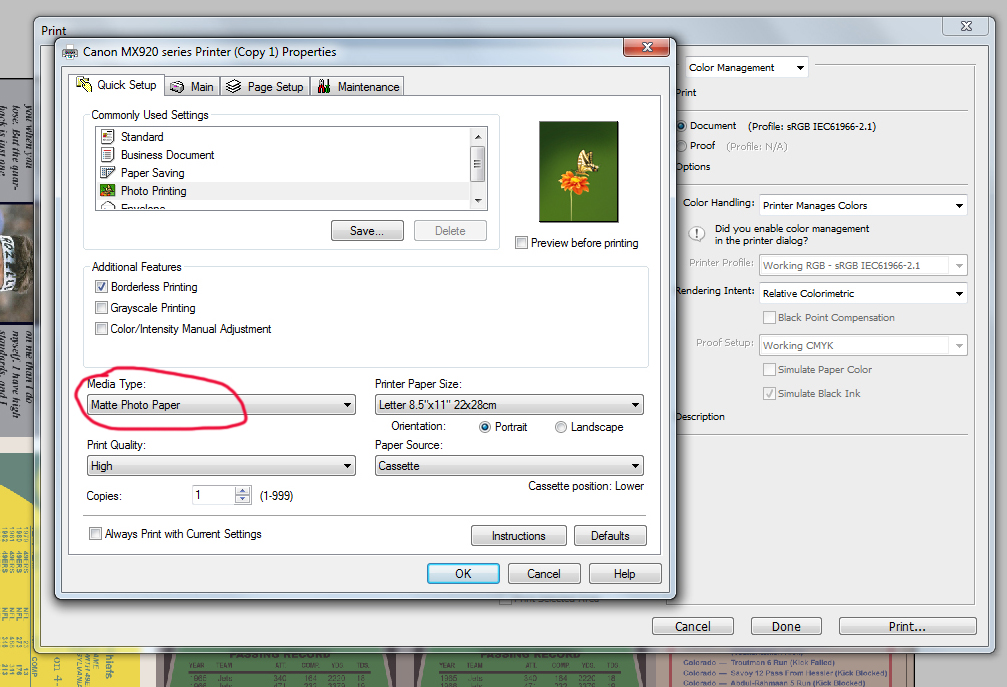
This should open a menu that allows you to select some specifics about your print. It might be a little different based on how your printer works. But, this is what mine looks like. Under the Quick Setup tab, you want to select the Photo Printing option. Make sure the paper size is 8.5x11, paper type is Photo Glossy and the Quality is the highest setting available.
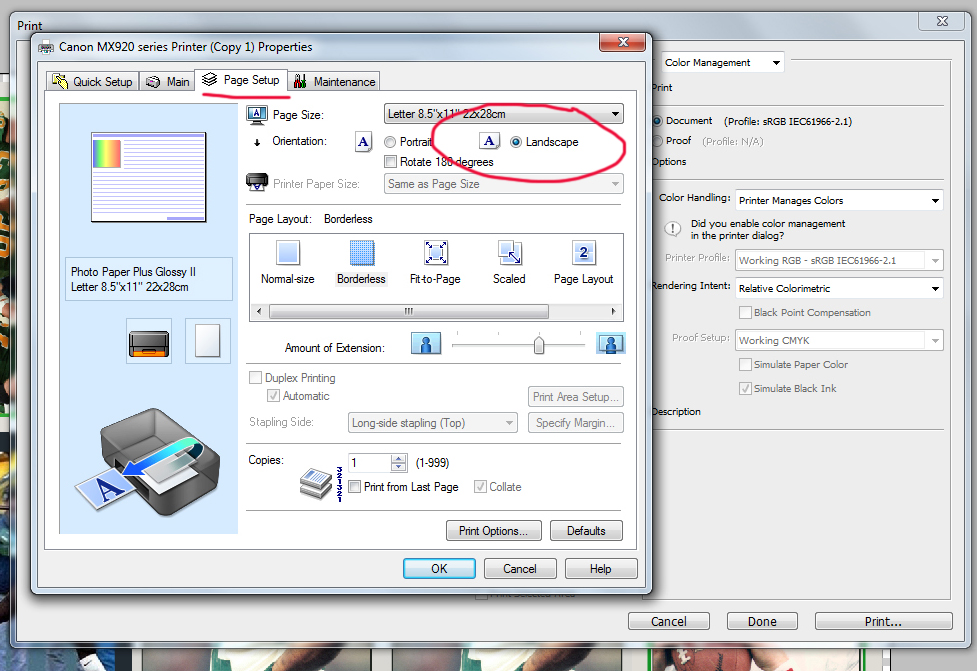
Next, click on the “Page Setup” tab and make sure the printing orientation is landscape. Click OK.
Your printer might have slightly different menus than mine. The important thing is the printer needs to be set to print on a full size sheet of photo paper, the highest quality it can in landscape.
This will take you back to the main Photoshop printing window. Based on the resolution of our file, the printer wants to make the print huge…far bigger than a card should be. We need to scale the print. Under the “Scaled Print Size” heading there are some boxes. Make sure the unit is set to “inches” and change the height to “7.143.” This will set that to the height of the print. 7 inches is the height of two cards stacked together and 0.143in is the extra height of the cut lines. The width should automatically adjust.
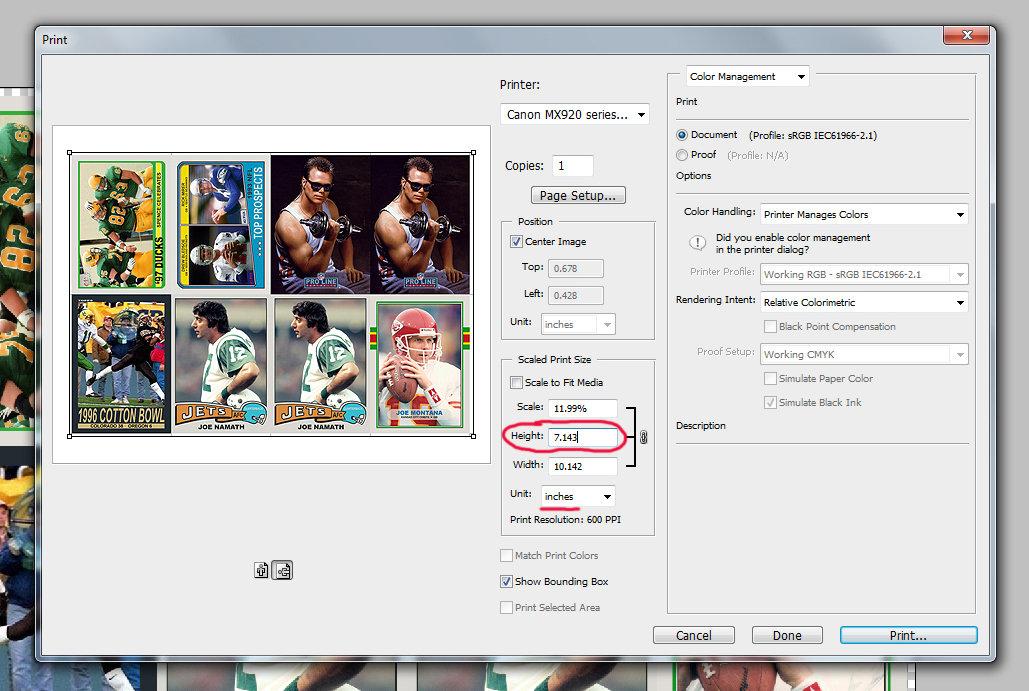
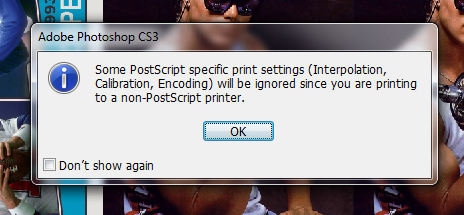
Press print. You will probably get the following screen popping up, but press “OK” and your front should print.
Repeat this process for the back with the exact same settings. The only difference is you want to select “matte photo paper” instead of glossy.
Just as a tip, the matte photo paper I have recommended is one sided. Make sure you are printing on the correct side. The correct side is brighter white in color than the back side.
OK, you should now have your front and back sheets printed and ready for assembly.
If you have any questions or anything is unclear, please let me know. The next tutorial will cover the assembly and finishing of the cards.
I print my cards on full size 8.5x11 inch paper with 8 cards per sheet. I have devised a print template that has a series of lines in place that allow for the cards to be cut properly. The print template is 6086x4286 and on a transparent background. You will also notice that there is an additional line that runs along the top boarder and the left boarder of the template. These lines will be important for the actual production of the cards later on.
You can simply drag the individual card .JPGs into a new template Photoshop document and position them as needed.
Below you will see the template (first image). Note that around the cards there are little black “lines” sticking out. These will be used when we cut the sheet into individual cards. From this point on, I will refer to these lines as “Cut Lines.” In the second image below, I have zoomed in on the upper left hand corner. You can see the additional line to the top and the left of the sheet. These run the full length of the sheet. From this point on, I refer to these additional lines “Guide Lines.” The guide lines will play an important role in Part 4 of the tutorial.
The back template is laid out in much the same fashion. There are a couple differences however. First, you will notice that the cards are arranged backwards. On the front template (see above), our Joe Montana card is in the lower right hand corner. On the back template he is in the lower left hand corner. It’s important to understand that the back side of our sheet will be the same orientation from top to bottom but will be reversed from left to right. That is why the sheet is laid out in this way. The guide lines are also in a different place. They are on the right hand side and the top (verses being on the left and top for the front sheet).
You will also notice one additional difference with the back template. It’s not on a transparent background. The background color of the adjacent card extends to the edge of the template in all directions. This will help with the actual assembly and cutting of the cards which I will discuss in Part 4. Here is the colored template background with the cards hidden.
You can see that all the area outside the cut lines are filled with the color of the card (the area in the middle under the cards is unimportant). To do this, use the dropper tool and then use the rectangular marquee tool to create a selection in the appropriate area and fill it. Make sure you have the background layer selected and it is the very bottom layer of the template file.
Now that you have your templates laid out and ready to go…it’s time to actually print the cards.
I have pre-made templates I created for printing. I simply delete my old cards out and drag new cards in to print. If you would like me to send you a blank front and back template I am happy to do so. The lines are all in place so all you have to do is put the cards in and adjust the back background colors to match your cards. Please PM me and I will send them to you.
You will want to use different types of paper on the front and the back. Older cards like this tended to have a slightly glossy front side and a matte back. I use HP Everyday Glossy Photo Paper for the front and Epson Premium Matte Photo Paper for the back.
We will print the front first. Open the front template .PSD file and in the upper left tool bar select File/Print. You should see a screen that looks like this. Select “Page Setup.”
This should open a menu that allows you to select some specifics about your print. It might be a little different based on how your printer works. But, this is what mine looks like. Under the Quick Setup tab, you want to select the Photo Printing option. Make sure the paper size is 8.5x11, paper type is Photo Glossy and the Quality is the highest setting available.
Next, click on the “Page Setup” tab and make sure the printing orientation is landscape. Click OK.
Your printer might have slightly different menus than mine. The important thing is the printer needs to be set to print on a full size sheet of photo paper, the highest quality it can in landscape.
This will take you back to the main Photoshop printing window. Based on the resolution of our file, the printer wants to make the print huge…far bigger than a card should be. We need to scale the print. Under the “Scaled Print Size” heading there are some boxes. Make sure the unit is set to “inches” and change the height to “7.143.” This will set that to the height of the print. 7 inches is the height of two cards stacked together and 0.143in is the extra height of the cut lines. The width should automatically adjust.
Press print. You will probably get the following screen popping up, but press “OK” and your front should print.
Repeat this process for the back with the exact same settings. The only difference is you want to select “matte photo paper” instead of glossy.
Just as a tip, the matte photo paper I have recommended is one sided. Make sure you are printing on the correct side. The correct side is brighter white in color than the back side.
OK, you should now have your front and back sheets printed and ready for assembly.
If you have any questions or anything is unclear, please let me know. The next tutorial will cover the assembly and finishing of the cards.